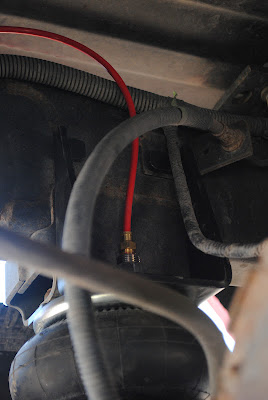
Ahhh, it was a beautiful day for an Air Bag install. The weather was great so I grabbed Gerald (a fellow RVer) and we got started. From Reading the instructions (I know, Real Men don't need no stinkin instructions....lol) but I did anyway, hey I was board, the install looked pretty easy and strait forward. Gerald, however had installed a set on his truck, also a Dodge, so it was nice to have a helper with some experience. Step one, remove the bump stops. Pretty easy as they are just bolted on.
Step two, pre assemble a couple of parts, fit them in place and bolt everything down. This is where the extra set of hands sure came in helpful.
Step three, run the air lines. Again pretty strait forward, as all you need to do is insure a strait cut on the lines and insert them in the coupler. You then run the lines along he frame, using zip ties.
Step four, drill a couple of small holes to place the inflation valves. Install the valves and plug the air hose into them. I chose to drill the holes on either side of the license plate, just below the tailgate. They are out of the way, yet accessible.
Step five, fill the bags to the desired PSI (min 5) and enjoy your new ride. I put about 40 PSI in them and left it for an hour, in order to see if there were any leaks. No leaks, so aired down to 5 PSI and took her for a test drive. No a big difference empty as you could expect, however they did seem to soften the jar when hitting bumps and rough spots in the road. To say the least, I am very pleased so far. I saved the bump stops from step one, just incase we buy a one ton truck later. This way I can change them over to the new truck as they fit both.
Update on Sheryl's back procedure. The injections went without a hitch, however she sure is sore from the injections. She's looking forward for the pain to lessen, as it's doing each day and enjoying her back being much better.
My knee is doing much better from the steroid injection, plus walking around with my crutch hasn't hurt either. However, I decided to take a little bike ride today and got in a situation where a bit of effort was needed to get over some gravel. I can tell you the ole knee said, What Are You Thinking, Ouch!!!. Lesson learned, stay on the street.
This weekend we may head up into the mountains to see how the spring bloom is coming along. If I get some good pictures, I'll be sure to share them with you. Until then, take care and we'll see you back here soon.


As you said always leave the minimum 5 lbs. of air to avoid moisture build up from causing adhesion inside the air bags.
ReplyDeleteIf you go to a one ton the suspension on a single rear wheel and a dually are different and the air bag capacities are also different. (At least on My Brand the brackets were different.)
Good Luck with the smoother towing you'll love it.
Be Safe and Enjoy!
It's about time.
Nice install, hope you are pleased with the ride with the trailer attached.
ReplyDeleteYou're going up in the mountains again? Watch that knee (and the other one too!)